Your Guide to Using Ethereum on Valora: Part 1 - How to Buy ETH
February 8, 2024


Ethereum is now available on Valora. Wondering how to get started? Here’s what you need to know:
TL: DR;
How to buy ETH in Valora - any activity on Ethereum requires ETH. You can easily buy ETH in Valora by selecting “Buy” on your quick actions menu.
How to send/receive ETH from Valora - you only need a phone number, wallet address, or QR code to transact with other crypto wallets on Ethereum. Just remember to ALWAYS check that they are on the Ethereum network. Any funds lost may not be recovered.
How to view asset details and positioning - easily view a breakdown of how much of each asset you have and which network they are on under “View Assets.”
It’s finally here. Ethereum is now available for the entire Valora community. There’s a whole new world of Web3 opportunities on the same mobile experience you know and love - and we can’t wait for you to try it.
So, how does access to the Ethereum network integrate with your current assets, and the actions you can take in-app?
We’ll walk you through the basics of using Ethereum with Valora in a quick three-part guide - starting with the process of buying ETH.
There are countless opportunities for you to build a portfolio and grow your crypto assets. But before you begin exploring everything Ethereum has to offer on Valora, you must first add funds. All transactions on Ethereum require gas fees to be paid in ETH; meaning you must have ETH in your wallet (not just CELO or cUSD) before you can participate in any activity on the Ethereum network.
Here are three quick how-tos for getting started:
1. How to buy ETH in Valora
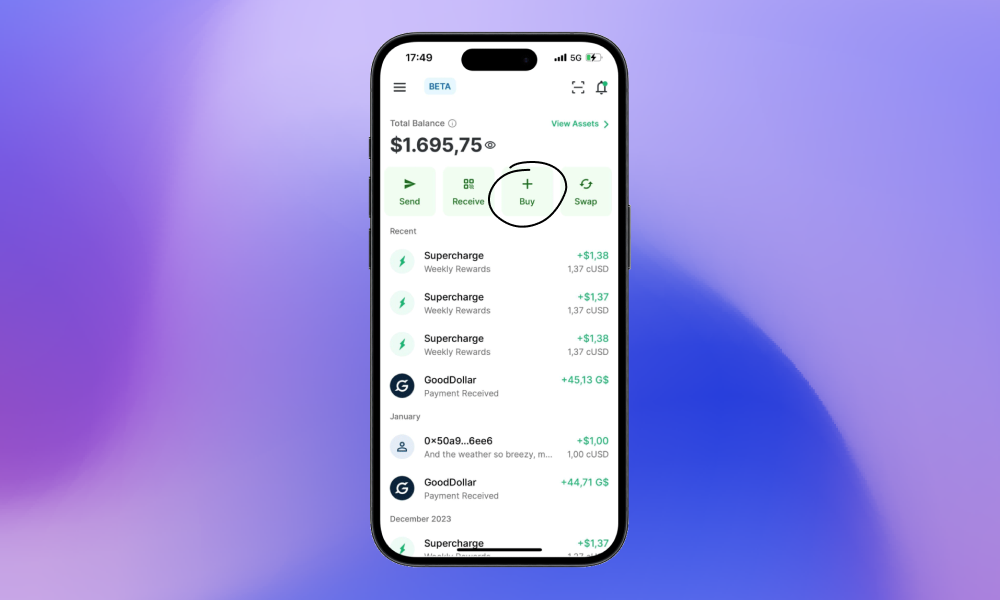
If you’ve used Valora before, then you’re likely familiar with the quick actions at the top of your home screen - shortcuts to send, receive, buy, swap, and withdraw your assets. Tapping or selecting the “Buy” action is the fastest way to purchase crypto on Celo - and now, Ethereum.
You will take the same basic journey when purchasing ETH in Valora - with only a few additional steps.
First, make sure you have updated your Valora app to the latest version (1.76.0)
***If you are using an older version, you will not have access to the same features.
Once updated, open to your home screen and tap “Buy” on your quick actions menu.
Tap “Ether” at the top of the list of assets.
Determine the amount of ETH you would like to purchase.
Select your preferred provider (Some providers are only available in specific regions.)
Review the order, and then check to ensure the amount and price of the ETH look correct (we also recommend you review the estimated gas fees.)
Continue to your provider to complete the purchase.
Once complete, return to your Valora wallet home screen.
The ETH purchase should be listed in your transaction feed in a matter of seconds, and your wallet balance will reflect your new assets.
Done! (skip down to section #3 to find out how to view your asset details)
2. How to send/receive ETH from another crypto wallet

If you already have Ethereum assets in a separate crypto wallet - transferring or sending these funds to a Valora wallet should be seamless.
Sending ETH
From your home screen in Valora, tap “Send” in the quick actions menu.
Tap “Scan or Show QR Code,” or paste your other crypto wallet address
Enter the amount of ETH you would like to send
Review before sending and double-check that the wallet you are sending to is on Ethereum.
Just head back to your home screen to confirm the payment was sent. When your transaction successfully goes through, your transaction feed and balance will update.
Receiving ETH
From your home screen in Valora, tap “Receive” in the quick actions menu.
At the top of your screen - you can toggle to “My Code.” - this is a QR code with your Valora wallet address that most Ethereum-based wallets will be able to scan to accurately populate your information.
You can also tap “Copy Address” to manually paste your wallet address into any send field.
**Prior to releasing any funds, please confirm that the wallet from which you are sending or receiving funds supports these assets. If not, your funds may never be recovered.
Similarly, when you tap “Receive” and then toggle to “Scan” at the top of your phone screen, you will be able to scan other QR codes. Please pay attention to what kind of wallet you are sending to and which asset you are selecting.
To send an asset from an Ethereum network wallet to a Valora wallet, follow the prompts in your crypto wallet to either scan or enter a wallet address, double-check the address (especially if it is your first transaction with that wallet), confirm it’s the right asset, and carefully check the total amount with network fees before proceeding.
Once sent, your funds should arrive in your Valora wallet in seconds.
Head back to your home screen to confirm the payment was received.
Success! You should see payment sent or payment received in your latest transactions!
3. How to view asset details and positioning
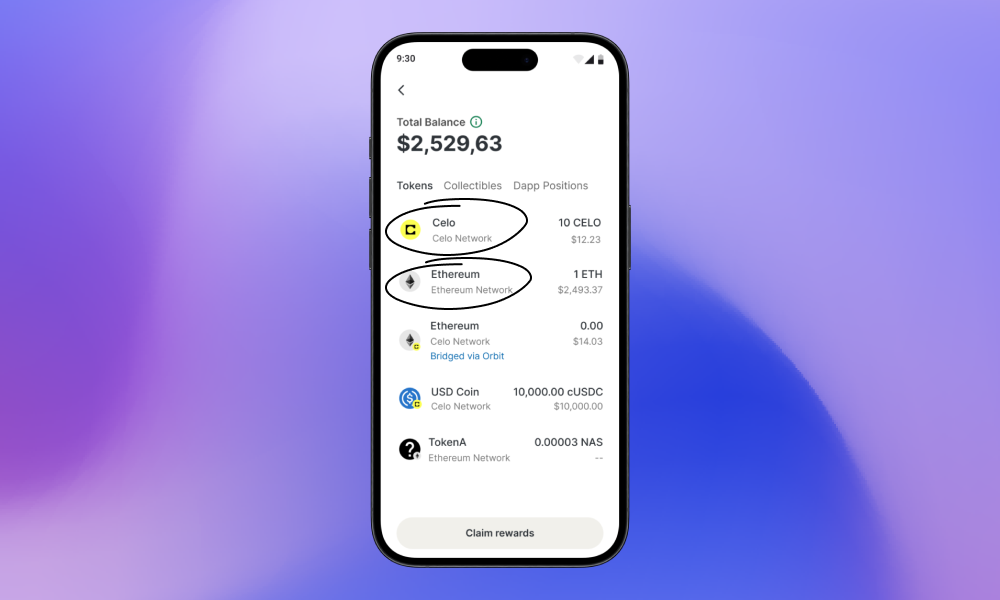
Once you’ve purchased ETH, you should see those funds reflected in your total balance almost instantly. For a specific breakdown of how much of each asset you have and which network they are on, you can view and manage your portfolio on Valora’s Assets page.
1. To view your portfolio of assets, simply tap “View Assets” on your home screen.
2. Under “Tokens,” you can view your assets and their real-time value.
3. Tapping into each asset will also give additional information about your asset’s position, as well as quick actions you can take should you choose to “Send, Swap, or Buy” more ETH.
Make your next move
Once you add Ethereum assets to your wallet, you gain entry into a host of new actions - whether it be sending ETH to your friends, swapping on the Ethereum network, or browsing an endless array of Ethereum-based dapps - everything is simplified in one user-friendly app. So congrats - you now get to sit back, relax, and enjoy the growing list of applications available on the leading blockchain network, all from the safety and comfort of your favorite wallet…
…(Valora). 💚
Follow us on X to keep up with more ways to make the most of Valora’s new Ethereum Beta. But stay tuned for Part 2, as more features will be arriving very soon.
In the meantime, let us know which features you would like to see next. Community feedback is crucial for building the future of accessible, mobile-friendly crypto!